
Would you like to start a blog and make money online? Then keep reading; this post is all about helping beginners launch their blogs in a few easy steps!
One of the biggest hurdles for me, on my blogging journey, was deciding which blogging platform to use. I knew I had to purchase a domain name and web hosting, but how to bring them together and make them work simultaneously was a mystery to me. Being new to blogging, I knew I wanted something easy yet something that looked professional. However, the simple solutions in 2009 that were already assembled looked clunky and amateurish.
I decided to hire a web designer to help me set up my blog.
I had never worked with a web designer before and knew nothing about how the process was supposed to work. I paid for all of the services upfront, which, sadly for me, was a costly mistake ($600, which did not include my hosting fees or domain costs).
After months of waiting for her to complete the work, she stopped communicating with me. I was left with an incomplete blog, and I had to hire a web programmer to fix and complete the work that she had left undone (another $150).
From start to finish, it took four months to set up my blog and cost $750 plus hosting and domain costs. A process that was only supposed to take 6-8 weeks. Starting a blog doesn’t have to be slow, expensive, or a pain in the neck.
If you’re ready to start a blog from scratch and make money from home, here is your step-by-step guide to begin.
How to Start a Blog Using WordPress
The initial steps of signing up for Bluehost and installing WordPress should only take 10-20 minutes. However, the design process will take longer. You’ll need to choose fonts and color schemes and set up categories, menus, your logo, and plugins.
Be patient, have fun, and remember progress over perfection. You can always switch up your design elements later on in the process. I’ve been blogging since 2009, and I’ve changed up my logo, theme, and site design many times over the years.
What is WordPress?
There are four main components to a blog, your domain name, hosting company, content management system (CMS), and blogging theme.
WordPress is a content management system, and it’s the industry standard for starting a blog. This is where you will create and store all of your content; think of WordPress as a house and word-processing tool for your blog posts.
Your domain name is the web address of your house (website), and your hosting provider is a service that enables your website to be accessible via the web. How your website looks online is based on the theme that you’re using.
To start a blog, you’ll need to combine all of these elements, and we’ll discuss the details in depth below.
Step 1: Choose Your Blog Niche
Before choosing a domain name and theme, you need to figure out what topics your blog will cover. What are you going to write about regularly? You may already have an idea in mind, but if not, I suggest doing some intense brainstorming. Write a list of your passions, hobbies, and dreams, and a second list with your skills, experiences, and areas of expertise. Then start thinking about possible blog topics and post ideas. If you’re coming up short on article ideas, it’s probably not the best topic for a niche. You should choose a topic that you can talk about non-stop.
You’ll want to take a good amount of time with this step, as your niche is the basis for everything else you’ll do with your blog.
Here are some popular and profitable blog niches to consider:
- Arts and Crafts
- Beauty
- Business
- Career
- Christian
- Cooking
- Fashion
- Finance
- Home Decor
- Homeschooling
- Lifestyle
- Parenting
- Politics
- Travel
If you need more help picking a niche, check out this post for some helpful tips.
Step 2: Set Up Your Hosting Account
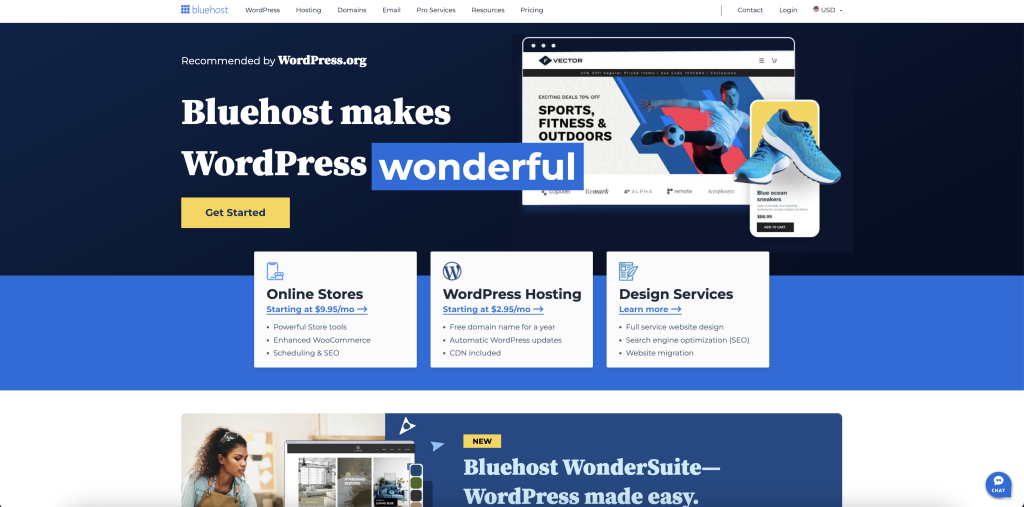
When I set up my hosting account, there were so many steps involved. I had to decide between a Linux or Windows account, then there was the separate c-panel and FTP; I was totally lost. Save yourself a headache and use Bluehost.
They have made the process so simple anyone can do it; no tech experience is needed. Besides being simple, Bluehost offers 24-7 support via phone, email, and chat, which you’ll want should you ever encounter a problem. They’re also affordable ($2.95 to $13.95 a month, plus a free domain name), which is a huge plus if you launch your blog on a shoestring budget.
For step one, all you have to do is go to Bluehost.com and click on the yellow “Get Started” button.
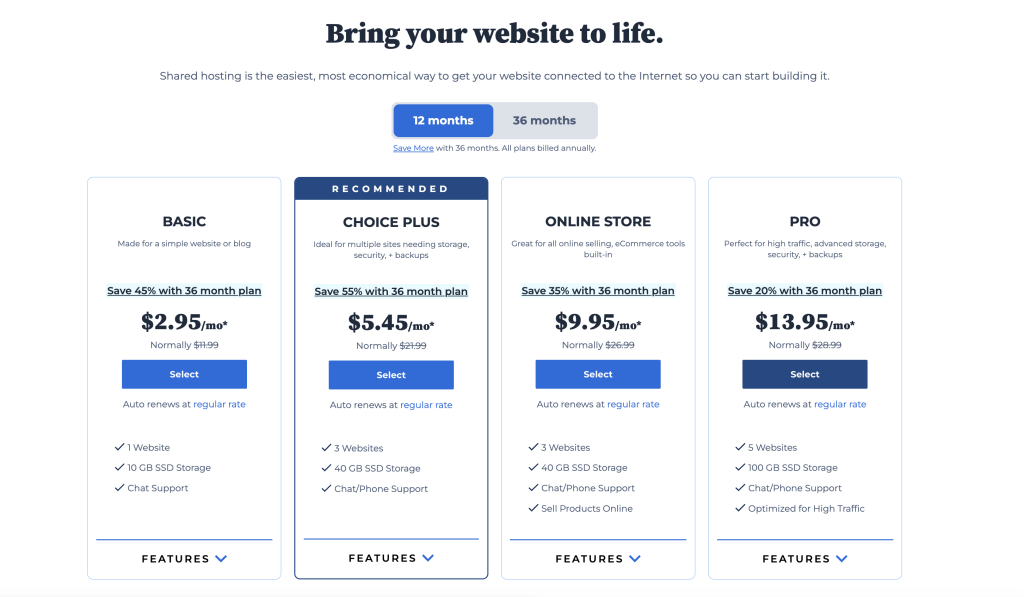
Step 3: Select a Hosting Plan
With Bluehost, there are three hosting options to choose from:
- Basic for $2.95 per month
- Choice Plus $5.45 per month
- Online Store $9.95 per month
- Pro $13.95 per month
The prices listed above require a 12-month purchase; you can also buy a 36-month plan of hosting, which will give you an additional discount of 20%-55% off, depending on which plan you choose.
If you have the funds, I’d suggest going with the Choice Plus Plan because you get more robust features, and it keeps your contact information private. If you’re going to be selling products like courses or printables, you’d select the Online Store option. With Bluehost, you also get a free custom domain name.
Step 4: Choose Your Domain Name
Your domain name is where people can find you on the web. It’s your street address but for your website. When choosing your domain, you’ll want something that is easy to remember easy to spell, and it can be helpful if it represents your niche. However, many people choose domain names that are unique, for instance, Gwyneth Paltrow and her website Goop.
When you choose a domain name, you’ll want to follow three simple rules:
- Keep it simple. Refrain from using words that are hard to spell or remember.
- Use a dot.com when possible. It’s what most people remember when typing in a web address.
- Stay away from words with multiple spellings, for example, to, two, too, or 2.
Once you’ve decided on a domain name, type it into the search box and click next to see if it is available. You may need to brainstorm a few ideas to get the keywords and dot.com that you want, but don’t worry; you’ll find one that works.
Step 5: Select Your Hosting Package
After you have your Bluehost account created, you’ll be directed to a page where you need to select your hosting package. You can choose to pay for your hosting in a 12-month period or 36-month period; remember, the longer the plan, the cheaper your price. Here, you’ll add your payment info and wait for an email confirmation of registration; this only takes a minute or two.
Step 6: Install WordPress and Pick a Theme
The awesome thing about Bluehost is they make installing WordPress a snap! No tech background is needed. All you have to do is go through the guided prompts and answer the questions; it really is that easy!
Once you’ve created your account and set up your password, it’s time for the fun part, pick your theme!
Now the fun part, picking a theme for your blog! Your theme is like a book cover; it’s your blog’s design element, including fonts, colors, layouts, navigation, and overall appearance.
There are both free and premium themes that you can use to customize your site. There is nothing wrong with using a free WordPress theme; in fact, many bloggers use a free theme along with the Elementor plugin for added functionality and design options.
However, if you’re willing to spend around $100, you can get a stylish, professional-looking theme that will make you stand out from the crowd. You can either purchase a theme from the marketplace, or you can purchase a theme through Kadence (they are known for loading quickly). But if you’re working on a budget, there’s nothing wrong with using a free theme; Astra and Elementor are two free design templates that are commonly used. Just click on the theme you want to use and click Install.
Once you’ve chosen your theme, you’ll be ready to install WordPress. Again, Bluehost makes the process so easy by guiding you through the steps.
Step 7: Customize Your Blog Design
When you log in to your account, you’ll be able to customize your site with different pages, categories, sub-categories, colors, fonts, widgets, and more. Once you’re inside WordPress, click on the Appearance Tab on the left-hand side to start customizing your site.
You want to structure your site properly by adding navigational, informational, category, sub-category, and legal pages to your site.
All blogs should have the following informational pages in their navigational menu:
- About Me
- Contact
- Privacy Policy
- Terms of Use
- Disclaimer
In your header menu, you’ll want to have your main blog categories for your niche, and then under your main categories, you’ll have your niche sub-categories.
For instance, if you’re a food blogger, you may have these are your main categories:
- Breakfast Recipes
- Lunch Recipes
- Dinner Recipes
- Desserts Recipes
Now, under each main category, you’ll want to list your sub-categories. In this case, the dinner category may have:
- Chicken
- Beef
- Pork
- Seafood
- Vegetarian
Having properly structured categories makes it easier for your readers (and Google) to understand and navigate your blog’s content. It will also make it easier for you to come up with new blog post ideas.
Add a Blog Logo
When you’re customizing your blog, you have the option to upload a logo. If you have room in your budget, you may want to purchase a custom logo for your blog. Having a custom logo helps distinguish you from other bloggers, which helps with your overall branding.
But if you’re running short on cash, there are some affordable and free options available.
For as little as $5, you can search for a designer in the freelance marketplace, Fiverr. Some designers charge more, but there are plenty of talented designers who are looking to build their portfolios and will create a one-of-a-kind logo for you for just $5.
If you don’t have it in your budget right now, you can use a free template from Canva. Just keep in mind that if you use a free template from Canva, you won’t be able to trademark your logo.
Add WordPress Plugins for More Functionality
During the design process, you may find that you need to add some WordPress Plugins for additional functionality. For instance, you may want to add a contact form or start collecting email addresses for your email list.
To add a new plugin, just browse the available plugins in your WordPress dashboard and download the ones that you need. There are thousands of plugins like Yoast SEO and Rank Math that help bloggers optimize their blog posts for search results. Others, like Social Rocket, add share buttons to your blog content, so users can easily share your blog posts via social media.
While plugins can add more functionality to your blog, too many plugins can slow down your site’s loading time. Be sure to only download reputable plugins that are compatible with your WordPress site.
How to Write Your First Blog Post
Now the part that you’ve been waiting for, writing your first blog post! Since you’ve already chosen your niche and mapped out your parent and child categories, this should be easy in terms of what to write about.
Here are some simple tips to write high-quality content:
- Create a catchy title that will reel readers in.
- Break up your content by using sub-headers (H2 and H3), bullet points, and numbered lists.
- Add images to your post to help break up content and enhance the overall idea of the post.
- Proofread your post for correct spelling and grammar (I like to use Grammarly).
- Is your post helpful? Does it cover the topic in-depth?
- Did you properly quote and credit your sources?
If you need more help writing your first blog post, check out this helpful tutorial.
Marketing Your Blog
Before you can start making money from your blog, you need to market it; get visitors to read your articles.
Here are some of the most popular methods for getting traffic and marketing your new blog.
Word of Mouth
After I launched my blog, the first thing I did was sent out an email to all of my family and friends, letting them know about my new endeavor. Not only did I ask them to check it out, but I also asked them to spread the word if they knew of anyone who could benefit from it. This act alone helped to build traffic and momentum to my newly launched site.
Social Media
To help spread the word about new posts on your blog, you’ll want to create social media profiles on various platforms like Facebook, Twitter, Pinterest, Instagram, LinkedIn, TikTok, and YouTube. Each platform has its own pros and cons, and which ones you choose to use will depend on your niche, where your audience hangs outs, and what platforms you prefer. I suggest starting with two and investing time in nurturing and growing them before adding more to the mix.
Email Marketing
From the day you launch your blog, you need to start collecting email addresses from your readers so that you can remain in contact with them. To do this, you’ll need to sign up with an email marketing provider. Don’t worry; you don’t need to spend a lot of money to get started. In fact, you can get a free account with Constant Contact or ConvertKit (this is what I use).
Once you’re signed up, you’ll install sign-up forms on your blog so you can collect the reader’s email addresses and then send subscribers regular email correspondence.
This post explains email marketing in more detail so you can get the hang of it quickly.
SEO
SEO stands for search engine optimization. Basically, you want search engines, like Google and Bing, to index and rank your content high in their algorithm so that when people do an internet search, your content is easily found (preferably on page one).
When you do your keyword research and write your content, you’ll want to consider your niche, the reader’s intent, FAQ questions, and phrases that individuals are searching for and intertwine these into your blog posts. This is an oversimplified definition, but it gives you the gist of what SEO can do for your blog.
This article talks more about SEO so you can start learning the ropes.

How New Bloggers Can Make Money
Whether you want to make blogging a side hustle or earn a full-time income, there are many ways to monetize your blog! From paid sponsorships and working with ad networks to affiliate programs and selling digital products. Just click on the topics below to explore the various monetization methods.
- Sell Advertising Space
- Affiliate Marketing
- Ad Networks (Google AdSense, Mediavine, and Raptive)
- Sell Printables, Online Courses, and e-Books
- Paid Sponsorships
- Offer Consulting Services
- Start a YouTube Channel
If you’re wondering how much a successful blog can earn, you can check out this post, where a bunch of successful bloggers share how much they make!
Why You Should Start a Blog in 2024
Yes, I still believe you can start a blog in 2024 successfully.
Blogging has been a dream career for me, and even after doing this for 14 years, I still love it. Yes, there are challenges and the landscape changes almost daily, but it’s still a viable option for making money from home.
Here are some reasons why you should start a blog. You get to work in a niche that you love, it’s easy and affordable to get started, and it offers freedom, flexibility, and financial stability.
You also don’t need any experience or a college degree to get started; it’s perfect for beginners! It also teaches you new skills that can be carried over into a traditional job or another business venture. You’ll need to put in some sweat equity, and it may take many months before you begin making money, but it might be the best decision you ever make!
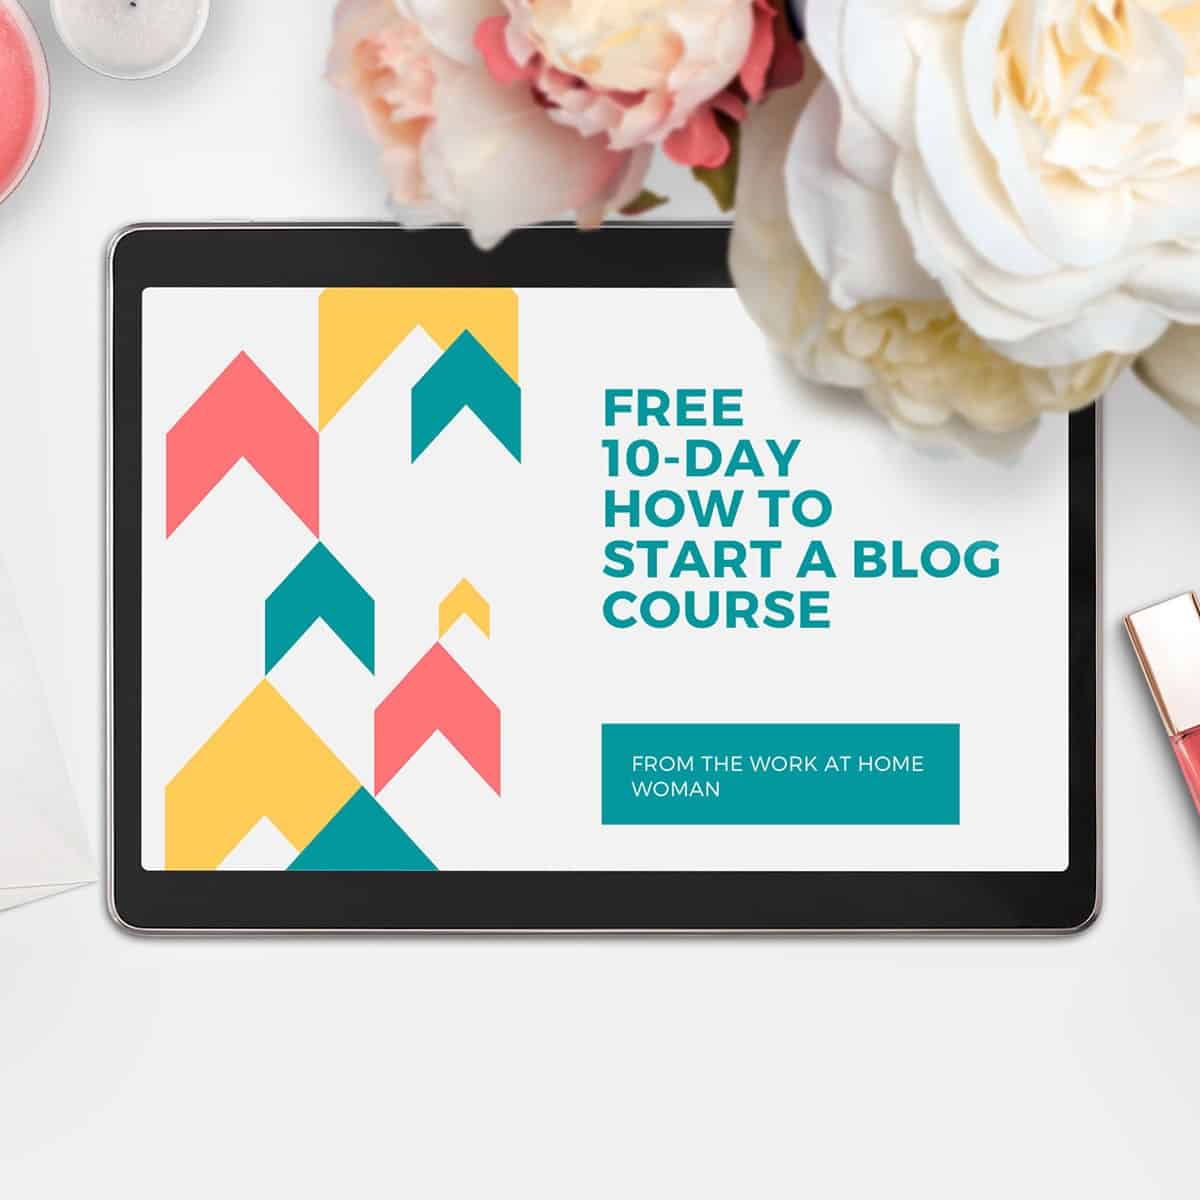
Are you ready to start a blog? Be sure to grab my FREE blogging e-book, where you’ll learn tips for creating awesome content, getting traffic, and monetizing your blog.
Do you want to start a blog? What’s holding you back? What questions do you have about the setup process? Drop me a note below, and I’ll respond to your question personally.
Originally published in July 2015. Content updated October 2023.


Hi Holly good afternoon! I am looking at potentially starting a blog and am a total amateur to this. I was wondering if you could email me and I could let you know what I was thinking and see what my best first step could be? Thank you. Ryan
Hi Ryan,
Sure — send me an email at [email protected].
I am a totally newbie to blogging, though I have a professional degree on hand, I am a more experienced mother with well groomed children all settled in life, which leaves me with all the time in the world to do whatever I can and I felt so many young couples struggling with bringing up kids with so much stress instead of enjoying the upbringing of their children. Do you think I can be of use to these kind of categories of population to help them enjoy parenting. This is the first time I am writing to any kind of media and I was really inspired by your detailed way of putting things across, well done Holly.
Hi Kasturi,
I’m glad you found the article helpful!
Absolutely! Parenting, working, and living can be difficult to balance, and I think a lot of parents would find this topic interesting. Of course, you’d want to do your own research and see what’s out there and if this is a viable niche for you.
All the best, and keep me posted!
Hello Holly, my name is Yuliet and I’m looking to do a side job from home. I’m very good at cooking and love to create my own dishes. I would love to start a blog about my cooking, but I’m not sure if I should start doing it in Spanish or English.
Any feedback you can provide will be greatly appreciated.
Thanks,
Yuliet
Hi Yuliet,
It would depend on where you’re located. If you’re in the US, I would say English.
I also think there is an easy way within the WordPress settings to have multiple languages. I’m not exactly sure how to set it up, but someone like Grayson at iMark Interactive can help you. Or you can try Googling how to set up a blog in multiple languages.
All the best, and keep me posted.
Good evening Holly,
This article was/is exceptionally concise. I am interested in creating a blog mainly to become self employed, however, I am not confident enough to start as well as a bit skeptical.
As stated before the article is well written. Thanks for that. I will reach out again.
Good luck, Nicole!
Keep me posted. 😊
Hi Holly, to answer your questions about monetizing my site’s blog… I want to use multiple options. Affiliate Ads, Sponsored Posts and Search Monetization such as: Mobile, Social Media, Videos. I want to add a donate button to a mental health charity that goes straight to the source that needs help. Open to other ideas.i love to learn. I was very happy about your contribution. I hope to keep in touch. I love your site. Lots of great information.
Hi Malik,
You can work with an ad network like Google Adsense, Media.net, Ezoic, Mediavine, or AdThrive. You can sell printables, e-books, or courses. You can sell services from your blog like freelance writing, social media, or coaching. The options are endless.
Hi Holly! I have worked in different medical fields off & on for 28 years now. I currently work full-time in the emergency room but not as a nurse. I have 18 years of experience working as an Emergency Medical Technician. I also have a Master of Arts in Human Services: Marriage & Family. It a non-licensed degree. I have no desire to go back to school another 2 to 4 -year period to get my license. I have used my Master of Arts in Human Services: Marriage & Family degree to work in field concerning individuals with mental illness of different ages from 4 to adulthood. I have been reading and toying with the idea of creating a blog writing about mental illness. I had a mother that was diagnose with schizophrenia when I was 3 years old. I have a son that was diagnose with schizo-affective disorder at the tender age of 20. I want to be able to leave the on-site medical field. I would love to have the chance to work from home with the ability to match or make more money than my current income. I do have a home office already setup. I love to read and to write. I would love to have some advice or your input of this. I discovered your website about a month ago and love your website.
Hi Vicky,
Great to meet you!
You are the perfect candidate to start a health-focused blog with your medical background! And mental health is beginning to be brought front and center because so many people deal with mental health issues. My question to you would be, how do you plan to monetize? Using display ads would be an easy way to monetize, but if you participated in affiliate marketing, what products would you promote? Or, if you plan on creating products, what else is out there?
I have a free 10-day blog set-up that walks through many of these details:
https://www.theworkathomewoman.com/wahw_optin/free-blogging-course/
Glad you’re enjoying the information! All the best and keep me posted!
Hello Holly,
To answer your questions about monetizing my website blog …I would like to use several options. Affiliate Advertising, Sponsored Posts, and a Search Monetization such as: Mobile, Social, Videos . I like to add a donate button to a good cause related to mental illness that goes directly to the source needing help. Open to other ideas. I love to learn. I really enjoyed your input. Hope to keep in touch. Love your website. Alot a great information.
Hi Vicky,
Browse through these articles, lots of ideas and info for making money with your blog:
https://www.theworkathomewoman.com/how-start-a-blog/earn-money-blogging/
So glad you’re enjoying the content! 😊
All the best!
My question is how much do I need in all to walk through this whole process, from the scratch to the end, most especially the stage where I have to pay for the hosting, that is step 5 above.
It really depends on which hosting plan you choose, but you’ll need to either choose 12 months or 36 months.
Then other things to consider are a theme which usually runs $50-$150. And if you want a designer to create a custom logo for you, that would be an additional cost. You can also use a free theme and Canva to create a free logo — however, you wouldn’t be able to trademark your logo if you use Canva’s templates.
Thank you, I enjoyed reading this tutorial on starting a blog. When I started mine years back I was always looking for simple and step-by-step instructions to get started and they weren’t always visible. You’ve simplified it here on this post! Also thanks for including links to how to actually make money on a blog.
Glad you enjoyed the tutorial, Demetria! How long have you been blogging?
I want to start a blog, but I am so nervous I’ll fail or not be able to compete with others in a specific niche. I am currently working full time in hr, but am looking for something more in my passion. I love to travel, that is my passion. I love trying new food and seeing new places. the ideas I have for blog are all over the place because I have my passion, but then my skills are more professional. I am good at reviewing and helping others with resumes and I like working with people on career growth. I just don’t know what to do!
Hi Kari,
It can be scary putting yourself out there — but remember you’re the only person with your unique perspective, experiences, and stories — and that’s what people want, a new take. You can always start a blog on the side, and once it earns enough, you can quit your full-time job.
I started freelancing, then started my blog, then eventually quit freelancing to focus on my blog full-time. It’s been a full-timer earner for me since 2014.
I have a free 10-day blogging course that can help you put it all together, including figuring out your niche: https://www.theworkathomewoman.com/wahw_optin/free-blogging-course/
I was thinking of doing a labor and delivery blog (L&D nurse for 15 yrs), do you think there is room for one?
Hi Shawna,
I haven’t researched the niche — but I’m sure people are searching for information on L&D. What aspects would you cover? Those looking to become L&D nurses? Coping tips for L&D nurses? L&D tips for pregnant women? I’d create a list of all the categories and sub-categories that you’d like to cover. Then start Googling the terms to see what people are searching for and what else is out there. Keywords Everywhere is an excellent tool to determine the search volume of keywords.
Good luck and keep me posted!
Why is hosting on word press important wat does it offer u
Hi Brittany,
WordPress is the content management system — it’s where you create and store your blog posts. The reason why I suggest WordPress is it’s easy to use, it has lots of functionality, and it’s easy to modify.
Hosting is basically where your website lives on a server. It’s a service that you’ll need to purchase if you want to own and monetize your blog fully. The domain, or URL, is the address of your website.
Let me know if that makes sense — I know it’s kind of confusing.
I have a blog, but I picked a tough niche. That or I’m doing something majorly wrong. My upward trajectory is slooooowww. and Googleads doesn’t seem to be paying me what they pay others. (My sister has a successful blog. She is on Mediavine now, but when she was using GoogleAds, she was getting paid much more per view.
Any thoughts?
Hi Sue,
Have you tried Media.net? I found that I made more with them than I did with Google Adsense. You should also diversify your income streams. Do you do affiliate marketing? Or do you work with brands?
Here are a couple of helpful posts:
https://www.theworkathomewoman.com/affiliate-marketing/
https://www.theworkathomewoman.com/become-an-influencer/
I’ve been reading more and more about blogging as a way to earn an income. I love crafting so I know what I could blog about. But my question is more on what content can you use. For example, if I want to explain about a craft I’m making, but the idea came from Pinterest or a craft site. Can you use it and just make sure you credit where the idea came from? Hope that makes sense. Thanks!
Hi Angela,
Yes, you’ll always want to credit your sources. You’ll also need to take your own photos, purchase commercial-free stock photos, or get written permission to use the source’s photos.
Good luck and keep me posted!
I don’t have any expertise in anything I want to write about. I graduated from college 10 years ago and never got a full time job. The most money I ever got is from what I’m doing now, pet sitting, which is $1000/month, not enough to live on. I like to write, I have written novels, but only published 2 short stories and self-published 3 short novels so I wouldn’t call myself an expert. I graduated with political science and am interested in international events, but I don’t really have expertise and doubt that could be a money making topic.
WHAT DO I DO????? HELP
Hi Evalynne.
Everyone, including yourself, has areas of expertise and passion. What you need to do is dig deep and figure out what they are.
Start by creating lists of your skills, your passions, things you’re interested in learning more about, classes in college that excited you, and then also list things that you don’t like or don’t want to do. Also, ask friends and family what positive qualities and traits they see if you. When you do this exercise, you’ll begin to see different patterns emerge which can help lead you to your true passion.
This article also has some good ideas for figuring out your writing niche:
https://www.theworkathomewoman.com/writing-niche/
Good luck and keep me posted!
When you pay for bluehost do you have to pay for word press too? I wanted wordpress but the cost of it is just too much at the moment.
No, WordPress is a free platform.
Hello , all I’ve got is a iphone and internet, can I put out a blog with just that?
You can. There is a WordPress app, although, I don’t know how easy it would be to set up. I personally wouldn’t be able to write my content using a smartphone — it’s just too small.
Hi Holly
I’m enjoying your blog – thank you for all the information. Blogging is terrific but I notice some of the comments on this post are from readers who are desperate to make money quickly. One lady was worried about losing her house. Blogging is excellent for a side income but it takes time to be successful. I would be worried about anyone using blogging to replace a full-time income from the get-go. That would be a lot of pressure.
Hi Alison,
I completely agree — blogging income can take time to build. Even on my own journey, I freelanced for many years, while running my blog. With any business you start, you need to be prepared to “work for free” while you’re building up your business and client base. That’s why it’s so important to have a plan and a backup plan before you leap.
Thanks so much for stopping by and commenting!
Yes, I like your efforts, and way to explaining the things clearly.
I know it’s not very easy to start a blog and earning money at home, it’s take time to establish your brand and fame at the web.
There are numbers of things which you keep in mind while taking step towards this platform,
Patience, resistance, consistency, hard-work, research, innovation, designing, and communications.
If you have all these above things you can plunge in this mud lol!
Otherwise stay, there are numbers of a person running a different blog in different niches like music, entertainment, health, and many others.
Hi Holly, thank you very much for your very educative article about blog creation. I also want to create a blog. I am living in tight budget. How much dollars roughly will it cost to create a domain?
Hi Isaac,
Through my affiliate link, you can secure hosting for as little as $2.95 a month. But you have to purchase the 36-month package, which would be $106.20 — but this includes a free domain name. You can use a free theme, but I highly suggest purchasing one, for $39 – $130. You can buy a custom logo design on Fiverr for $5, and you can use Sendinblue for email marketing which is free for a certain number of email subscribers. All in all, it shouldn’t cost you any more than $150.20 – $241.20 (plus tax).
If money is super tight, you could go with the 12-month hosting package for $4.95 a month which would cost $59.40, plus your theme and logo.
Good luck and let me know which path you decide to take.
Thanks for the article, Helpful info, and it sounds like setting up a blog is do-able….!
Glad you enjoyed the tutorial.
I’d like to start a blog, I feel it’s easy but with all the info don’t know where to start. The goal is to have fun with it and earn potential income. How do I come up with great topics people would go for. I tried this kinda before but didn’t complete process. It gave me headache ??. By the way thanks for your blogging education. Very informative..?
Hi Barbara,
Have you taken a personal inventory as I suggested in step number one? It all starts with brainstorming and working out from there.
For example, if your hobby is cooking, start with the different categories of recipes you enjoy cooking: Baking, Grilling, Vegetarian, Gluten Free, Beef, Chicken, Crockpot, Budget, Exotic, etc. Then break it down from there: Baking: Cookies, Pies, Cakes, Breads, Quick Breads, Baking Tips, etc. If you’re not coming up with enough categories, sub-categories, and topic ideas, it’s probably not a sustainable topic for you.
Also, research what’s already out there and figure out your point of difference. This first step will probably take the longest amount of time, but it’s also the most important.
Good luck and keep me posted!
I appreciate all the info you have here. I have had to retire from a 50 year career because of a health problem and I desperately need to find something to do at home to keep from losing my house. I have been looking at your site for months now, and just can’t find anything I would be interested in doing. I had a blog once before, years ago, and loved it, but never made any money from it as I didn’t understand how to. I have stayed away from the blogging idea because I know it takes a while to get going (making any money) and I need some NOW. But, after months of not finding anything else suitable, I have decided that if I don’t get started doing something, I’ll never get anywhere. After reading all of your info here, and printing out all of the basics to get started, it’s a little daunting! There’s so much more to it than I thought. I think I know what topic, niche, to use and want to start with affiliate marketing, but there is SO much to know and get it started! I hope I am able to get this all figured out! One thing you suggested is to connect with other bloggers to get tips on how to do things. How do you do that? Where do you find them?
Hi Maureen,
Facebook has a bunch of great blogging groups. Just type blogging groups into the search function and join the ones that appeal to you.
Good luck on your journey =)
I think the biggest challenge for me is coming up with an idea for a blog. I am a skilled writer, but coming up with the niche to blog about seems to be my major hurdle at this point. Also, once you come up with a theme to blog about – how do you determine whether or not that theme is already being covered in an existing blog? Thank you.
Hi Kim,
I like to make a list of my passions, hobbies, skills, experience, interests, and schooling and do mind-mapping exercise to see if I can come up with enough topic ideas on that subject matter. If I can only come up with a handful, it’s probably not something I’m genuinely passionate about.
Once you have your niche picked out, then start researching what else is out there. Do a Google search, Instagram search, and Pinterest search — this will give you a wealth of information. Once you find your competitors, figure out how you can put your unique spin on the topic. I like to include personal stories in my content because I know that no-one else will have exact experiences.
Good luck and keep us posted =)
Though I am a man I liked your blog very much. I am also from none tech background. Want to start a blog related to health and fitness. So plz give any suggestion.
The information here is applicable to both women and men =)
Just start with the steps above, and work your way through the tutorial. Pick out a fitness and health-related theme, and start writing your content.
Let me know if you have a more specific question — or if you’re stuck on one of the steps.
Good luck!
Can we set up Adsense for a free WordPress theme? And a free shopping cart theme. Anybody can help.
Yes, you can set AdSense up on a free theme. AdSense does have some rules for getting started, you can check them out here: https://www.google.com/adsense/
You can also find free themes and plugins by doing a Google search.
Good luck!
Hello,
I want to start an educational tutoring blog but I want to earn money. I presently private tutor from home but want to expand and be able to charge from online but I also want to be blogging about education informing parents and students. I am not sure how to set that up once I set up the blog. Can you offer some help on how I can go about that. I don’t have a website yet but I am looking to set up blog page before August 2018 Birthday gift to myself.
That’s awesome, Alma!
YES! We have a blog set-up tutorial right here: https://www.theworkathomewoman.com/setup-blog/
Let me know if you have any questions.
Good luck!
Great article Holly! Very helpful and beginner friendly, if I may say :) I loved how you went in depth about every single aspect! I pretty much knew all of the above and I would agree with you on everything, especially on the making something ”look pretty” part. This is more than crucial if you want to get great responses from the readers.
Glad you enjoyed the tutorial, Victoria!
How long have you been blogging?
Hi Holly, I am considering starting a money making blog. Is this something you would consider being able to make a living fairly quickly at, or can I expect it to take a while? Thank you for all of the great information.
Hi Shannon,
If you put your nose to the grindstone — you can earn good money within a year, but the general rule of thumb is blogging is not the fast lane to making cash quickly. I’ve been blogging for nine years, but it took me five years to hit the six-figure mark. Bloggers like Sarah Titus have hit the six-figure mark within a year. Kristin Larsen started making $3,500 a month at the five-month mark. You can read their stories below:
https://www.theworkathomewoman.com/single-mom-six-figures/
https://www.theworkathomewoman.com/monetize-her-pinterest-activity/
Good luck and keep us posted!
Hi, I have heard that if you re a graphics designer its best to have a unique design for your portfolio. So in that case case is it possible to customize the web design as we like? Any restrictions? or any recommendations for a theme as of such?
When you purchase a theme, you can customize it in a variety of ways. You can also insert your unique logo. Be sure that you’re complying with copyright laws for your images and fonts.
I did accounting books for customers in Va. I now live in Alabama. I have twenty years of experience, i worked as an Accountant for several companies before i opened up my own business.
What would be the easiest and less costs way to once again do books at home? I have QuickBooks Pro Accountant version on my computer.
Thank you for replying.
CHERYL M.
Check out this post, Cheryl: https://www.theworkathomewoman.com/bookkeeping-business/
Hi Holly
Nice article and I am really inspired. I have a free WordPress blog and I would like to take the next step of getting a domain and making money from it.
I have a problem getting a nitche, I want to write about girls/women. I have a problem getting a good name for the blog.
I just write on things that cross my mind, please help me with some advice
Hi Elsie,
Glad you enjoyed the article!
Take a look at these posts:
https://www.theworkathomewoman.com/writing-niche/
https://www.theworkathomewoman.com/finding-your-niche-by-following-your-heart/
https://www.theworkathomewoman.com/stand-out-blog/
It’s a good topic, I have been using Blogger platform more than 5 years. You can use that also, where you need too buy only domain and after that you can setup blogger blog in Blogspot hosting which is absolutely free.
Glad you enjoyed the article!
Yes, you can use Blogger, and it’s free, but you’re limited in how you can monetize your blog. If you want to be a professional blogger, I highly suggest paying for your domain and hosting so that you own your platform and can monetize in any way you wish.
Holly,
You have provided a substantial amount of information regarding Bluehost and Word Press which is most helpful to say the least. What I would like to do is create a site which I can display and sell products from. Can I use Bluehost and WordPress to do this? If so, how do I go about it. What plan should I consider? I’m looking for ways to make money from home.
Yes, you can create an e-commerce site with Bluehost and WordPress, but you’ll have to add either a plugin or an e-commerce platform like Shopify as well. I would go with the top plan if you’re able to do so. Make sure you do more research in terms of adding the shop — there are lots of different options out there — all with their own pros and cons.
I created my blog today on Wordpress and I can’t do no packages for hosting and domain right now. Can I still get traffic without all that? I did also do my first post and a lot of the customation. Am I okay to put it off?
Yes, you can still get traffic using the free version of WordPress. It’s fine to put it until you can afford it.
Have thought about setting up a blog many times but didn’t know how or were to start. Put it off because the whole process overwhelmed me. Thank you for breaking the process down, I will have to just decide on a topic.
Great article! I’ve been trying to set up a blog, but due to lack of funds I began on the Wordpress free platform. Is it practical to keep developing content for that free blog and then transport it to a paid platform or should I begin from scratch on a paying site? And also, how much content should I have before I launch my blog? I’ve wanted it to be so perfect I’ve barely brought myself to write, even though I have so many wonderful posts trapped in my head, but they have to get out of there, I need to start! Thanks in advance!
I just have to say, you have provided the public with so much useful information. Thank you – it’s very helpful! Although I have a blog, it’s not in my niche area, have so much to think about now! Amazing work!!!
Thanks, Shelley! Appreciate your kind words!
Thank you so much for this informative yet free startup article which is better than what Ive seen from those who charge. I want to know should I start with one thing cause I got so many things in my head that I have a passion for. Home Interior Design, Clothes , and everything a woman love and see where Anthropologie has pulled it off very well.
I was looking at reviews on web hosting which Host Gator Cloud came in first showing the best upload speed which understand is an essential element to have for a site and Blue Host Cloud in 4th but understand they are great for beginners so Im at a lost now.
Also saw if one hates content writing I can pay to have it done in one of your other articles which I think Im going to do because I’m not good at it.
Any insight to these issues would be most appreciative.
thanks in advance
Hi Debra, I don’t have any experience with Host Gator. I like Blue Host because it’s easy for beginners to set up. Not all hosting companies make the process this easy. I started off with Go Daddy and I wasn’t happy with their services and I need a web programmer to upload the blog to the host because the process, at least 8 years ago, wasn’t intuitive. Also, if you don’t enjoy writing — blogging probably isn’t the right path for you.
Hello! I am so happy I found this article. I hope you can answer a few questions for me! I actually want to start my own event blog bc I would love to start planning events in regards to food and activities?. I love booking restaurants for my friends and family, they always look to me to find a place for them and I feel so good when they tell me they loved what I suggested for them! I am 23 and currently in college . I have been wanting to kick this off for years and was wondering if you have any frost step suggestions for someone who is not majoring in this field! ( I am a public relations major) Thank you so so much, wonderful help! :)
Ariel B
After you have your blog set up, you’ll want to install these must-have plugins for added functionality. All of these are free for the basic usage.
Yoast (SEO plugin)
WordFence (Security and anti-virus plugin)
Askimet (SPAM plugin)
Google Analytics for WordPress (Traffic data)
Social Warfare or Shareaholic (Social sharing buttons)
Next, you’ll want to set up your social media profiles/accounts.
After that get comfortable with blogging, writing, responding to comments, promoting your content, etc. You can grab me free e-book which helps with writing, getting traffic and monetizing. https://www.theworkathomewoman.com/newsletter-signup/
What do I blog about? A general topic or a specific topic?
Here are a couple of helpful posts on how to choose a blog niche:
https://www.theworkathomewoman.com/writing-niche/
https://www.theworkathomewoman.com/stand-out-blog/
I love helping people and went through my own weight loss journey and when face to face with people I do very well and pretty quick I get more and more people but its a face to face thing where Im teaching a crossfit or boot-camp style outdoor exercise routine and follow it up with some dietary knowledge and its a great combo but….I started a blog a while back and wrote some of my best secrets in some well written blog articles and also started a youtube channel. I stayed at it for a few months and got maybe 5 followers on the blog and a few dozen views on my youytube videos. I dont understand because some of the most ridiculous youtube weight loss videos brag about losing 10 pounds in 10 days and some bikini clad babe give the most bland answer like “Dont forget to drink lots of water” [that was day 1]…and has millions of views!
I want to blog about health, and add affiliate marketing to it but honestly, I dont know how to bring in readers that want to lose weight.
any advice on how to bring readers to my blog?
Many thanks and love your articles!
How are you promoting your blog, Mark?
I didnt want this to be my first post, but I think that is what he is asking. What ARE the best ways to promote a blog? I think we all of us would be interested in knowing. Thanks.
Hi Michael,
This post explains in depth 20 different ways to get traffic to your blog:
https://www.theworkathomewoman.com/20-ways-to-drive-traffic-to-your-blog/
Let me know if you have more questions — thanks!
Thank you so much for all of this useful information. I am very excited to start blogging and getting everything together and your post is so clear and easy to follow!
Good luck, Riley. Keep us posted =)
Hi holly, hope my geographic location won’t affect me when I want to make payment. I am in Africa, what payment option will I use? Thanks
It depends on how you monetize your blog and what payment methods are available in your locale. With blogging, you’re running a business, not working a job.
Greetings Holly;
Thank you so much for sharing your information to all that are interested. I am interested in creating a moneymaking Blog. Subject is musicians with instruments. And I hope to attract advertisements. Do you have any ideas or direction you could point me to? I am extremely new to the work from home and Blogging concepts. Thank you
MJM
Hi Mark,
What aspect do you need help with?
Thanks! This is great information. I’ll be using this to launch my blog in January.
Good luck, JT. Keep me posted!
Thanks so much. Suppose I select the Basic Plan, must I pay before registration is effected or later; say before the month runs out?
Hi Musa, With BlueHost you pay for the year in advance. Let me know if that answers your question.
Great article. I have now taken the plunge. I feel like I have over researched and as my sister just told me, I just have to do it. So I did, and later today I will begin work on making the blog itself.
Yay, way to go, Carol. Cheering you on all the way — keep us posted!
If only it was as easy as you describe. I’ve got my domain. but as for the rest who knows? Bluehost is barely user friendly and so far wordpress is garbage. and every single item want more and more money. I’m about ready to forget the whole thing.
Still fighting with it. I hope I can get it going sometime soon.
Hi Carol, Sorry to hear about your troubles. Did you upload WordPress to Bluehost? If so, what you need to do now is upload a theme. There are free ones that you can use, or you can purchase one from StudioPress (this is what my blog is designed with now), Elegant Themes, or Thesis. I’ve heard the Divi Theme from Elegant Themes is super easy to modify. Don’t give up you can do this — with anything new, there is a learning curve.
What options do you recommend when signing up for blue host? Site backup, etc
If you can swing the Pro plan, it has some useful features. I like the site backup and the privacy domain functions — those are two things I currently pay for with my current host and domain provider. If you can’t afford the more robust plan, you can use a free plugin like UpdraftPlus Backups to back up your blog. Good luck and keep us posted.
So, do you have to pay monthly cost for Bluehost and for WordPress? I looked at both Bluehost and WordPress and they both require the monthly payments made in at least 12 month increments which can be costly. Are there other options?
No you don’t pay both; WordPress is a free platform. What you’re looking at on the WordPress website is their hosting service costs. You’ll be able to upload WordPress directly from BlueHost. There are free options but you’re limited in how you can monetize. This post has some information on free options: https://www.theworkathomewoman.com/businesses-start-no-money/
Hi Holly,am a regular reader of your blog.i want to start a beauty blog.i want to know if I can start with the free blog first later on I can now pay for a domain name and hosting.please explain the free blog and let me know if I can start.thank you
Hi Adeola, With BlueHost there’s not a free option. You can setup a blog for free on WordPress.com or Blogger.com — but you’re limited in how you can monetize. You also end up with a domain name like: beautyblog.wordpress.com instead of beautyblog.com. You can switch to the paid option later down the road — I’m not sure how difficult it is to make the transfer.
Swapping is so simple with Wordpress. I use them for my blog and when decided to start a my Mum and Bub Beauty blog. I purchased a domain to look more professional. (I used http://secure.newdomain.com.au/ as I’m in Australia and they are Melbourne based)
When my domain was secured, I logged into Wordpress and it’s just a matter of changing your plan. After you have brought your plan (paid plans are premium and business) they also offer you a domain that you can buy from them, or you can map your own third party domain. This becomes free when you buy a plan with them.
As I had a third party domain all I had to do was log into my domain provider and change my server names. It really is so simple.
Hi Holly, I love your website I read it a lot. I am seeking something to do working from home. I love the idea of a blog, but I can’t figure out what to write about. Is having a blog with different topics normal? Or do you think it’s better to stick with one main idea?
It’s good to have a main topic — but you can branch out from there. Many coupon bloggers post coupons, discounts, money saving ideas, ways to make money, as well as home related stuff like recipes, parenting, etc. Have you ever tried mind mapping? That would be a great way for you to discover if you have enough ideas for a blog on any given topic. Good luck and keep us posted!
how do i “mind map”?
Hi Kate,
It’s basically brainstorming on paper. This article tells you how to get started:
https://lifehacker.com/how-to-use-mind-maps-to-unleash-your-brains-creativity-1348869811
Good luck!
Hi Holly,
I’m a bit confused…are you talking about using Wordpress.com or Wordpress.org when setting a blog? I heard not to use Wordpress.com for a blog even though its free because the blog isn’t really “yours” and they can do what they want with it. Can you clarify the difference between the .com and .org and which one should be used in setting up a website and blog?
Also, not sure if you’ve discussed this or not, but if you can talk about the schedule a new blogger should have that would be great. For instance, how much time you dedicates to what task, etc.
Thanks a bunch!
Gin
Hi Gin,
Yes, I’m talking about setting up a blog via WordPress.org. When you use the free platform WordPress.com — you limit your earning potential and you have a funky domain name: myblog/wordpress.com.
Time management is a very personal issue. You’ll need to figure out what the right balance is for you. As a general rule of thumb you’ll want to post regularly, which depending on your niche will vary. Some coupon bloggers post multiple times a day. I generally post 3 – 5 articles a week. But a lot of research and time go into writing my posts, because they are educational in nature. Personally, I’m of the mindset that it’s better to post less and ensure that your content is awesome! You’ll also need to spend time marketing your blog daily. Then there are administrative tasks like email, bookkeeping, replying to comments, editing, etc. A good place to start is by figuring out how many free hours you have to work on your blog. Once you know that — you can use the block scheduling method to plan out your tasks.
If you need more time management tips — there are a ton on the blog: https://www.theworkathomewoman.com/category/time-management/
Good luck and keep me posted on your journey!
When you pay for bluehost do you have to pay for word press too? I wanted wordpress but the cost of it is just too much at the moment.
No, it’s free with the hosting.
Thanks for the article, helpful info, and it sounds like setting up a blog is do-able! how does a person, a potential blogger, know if they have enough knowledge/ something interesting to say that people will want to read on a daily or weekly basis?
That’s a great question, Polly!
Take some time and create a list of topics you’d like to write about. Then for each topic create subtopics. Example: Cooking – Gourmet Cooking, Gourmet Cooking on a Budget, Gourmet Recipes, Easy Gourmet Recipes, Gourmet Desserts, Gourmet Chocolate Desserts, etc. Next brainstorm specific article ideas for each subtopic. Make sure to write these down on paper — it helps to visually see the process.
How many article ideas did you come up with for each niche? Look for the niches that have the most ideas. If you had a difficult time generating ideas for a specific niche, it’s probably not a good fit.
This article from Amy also has some great info on choosing a blog topic: http://amylynnandrews.com/how-to-decide-what-to-blog-about/
Good luck and keep us posted!
Hey Holly.
This is another great resource similar to Amy’s article:
http://www.makeblog.org/what-to-blog-about/
Thanks for sharing, Nicky!
This seems the best steps yet even though I am a complete novice but I am willing to learn and move towards earning some cash. My area of expertise includes Human Resources,Teen mentoring,baking (native) and more.Could you suggest what I can create as my mean blog or can I use more than one/ I nee dyour help with this. Thanks
Hi Sharon, What topics are you most passionate about? You want to make sure that you choose a topic that you won’t become bored with over time.
Just what I was looking for. I’m a bit overwhelmed but looks like I have my work cut out for me. I’ve worked at home for 20 years but I’m ready to move into creating an income with my blog. Thanks for the priceless info :-)
It’s really easy to set up this way. Let me know when you get your site up … good luck!
Great article, lots of people are put off by the technology side of creating a website so this is really helpful. One of the things I love about Wordpress is that it’s easy to pick a different theme if you change your mind once the blog is set up.
Yes, it’s very easy to modify and use. And with all the plugins you can add pretty much any function you need (shopping cart, forum, member site, etc).
once the option to download wordpress comes up, what do i do since ive had wordpress installed already on my computer
Are you using BlueHost?